Home
博客是怎么建成的
hugo+github pages+github actions 自动发布
Step 1 所需工具
安装golang
安装git
注册github账号
Step 2 安装hugo
方法1:使用winget
方法2:使用 scoop
scoop install hugo-extended验证:hugo version
Step 3 Github配置
1.创建两个仓库,第一个为博客源码,如blog,第二个为用户名+github.io(必须为这样)
2.创建私人token,权限为repo所有,workflow,为了自动发布使用
settings/Developer Settings/Personal access tokens/Tokens(classic)
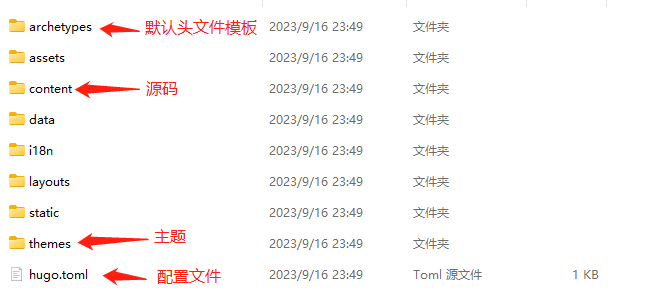
Step 4 使用hugo创建项目
hugo new site blog
Step 5 拉取主题
cd blog
git init
git submodule add https://github.com/McShelby/hugo-theme-relearn.git themes/relearn
编辑配置文件hugo.toml
baseURL = 'https://liangweidonggood.github.io/'
languageCode = 'en-us'
title = 'liangweidong blog'
theme = 'relearn'
Step 6 编辑主页
编辑archetypes中default.md,去除draft: true
+++
title = '{{ replace .File.ContentBaseName "-" " " | title }}'
date = {{ .Date }}
+++
content目录下生成主页面
hugo new –kind home _index.md
头部添加archetype=“home”
+++
archetype="home"
title = 'Home'
date = 2023-09-16T22:21:17+08:00
+++
编写正文。。。
注意事项:引入的图片资源,要在同目录下建立文件夹images
Step 7 自动发布
项目根目录下建立配置文件:.github/workflows/deply.yml
name: hugo-deploy-CI
on:
  push:
jobs:
  deploy:
    runs-on: ubuntu-latest
    steps:
      # step1 拉代码
      - name: Git checkout
        uses: actions/checkout@v4
        with:
          submodules: true
          fetch-depth: 0
      # step2 构建环境
      - name: Setup Hugo
        uses: peaceiris/actions-hugo@v2
        with:
          hugo-version: 'latest'
          extended: true
      # step3 构建
      - name: Build
        run: hugo
      # step4 发布
      - name: Deploy
        uses: peaceiris/actions-gh-pages@v3
        with:
          personal_token: ${{ secrets.PERSONAL_TOKEN }}
          external_repository: liangweidonggood/liangweidonggood.github.io
          publish_dir: ./public
          publish_branch: master
          commit_message: ${{ github.event.head_commit.message }}
Step 8 提交代码
完整命令
# 安装
scoop install hugo-extended
hugo version
hugo new site blog
cd blog
git init
# 拉取主题
git submodule add https://github.com/McShelby/hugo-theme-relearn.git themes/relearn
# 编辑hugo.toml和archetypes/default.md
hugo new --kind home _index.md
# 编辑_index.md
git pull --rebase origin master
git add .
git commit -m "init"
# 添加远程仓库
git remote add origin https://github.com/liangweidonggood/blog.git
git push origin master


